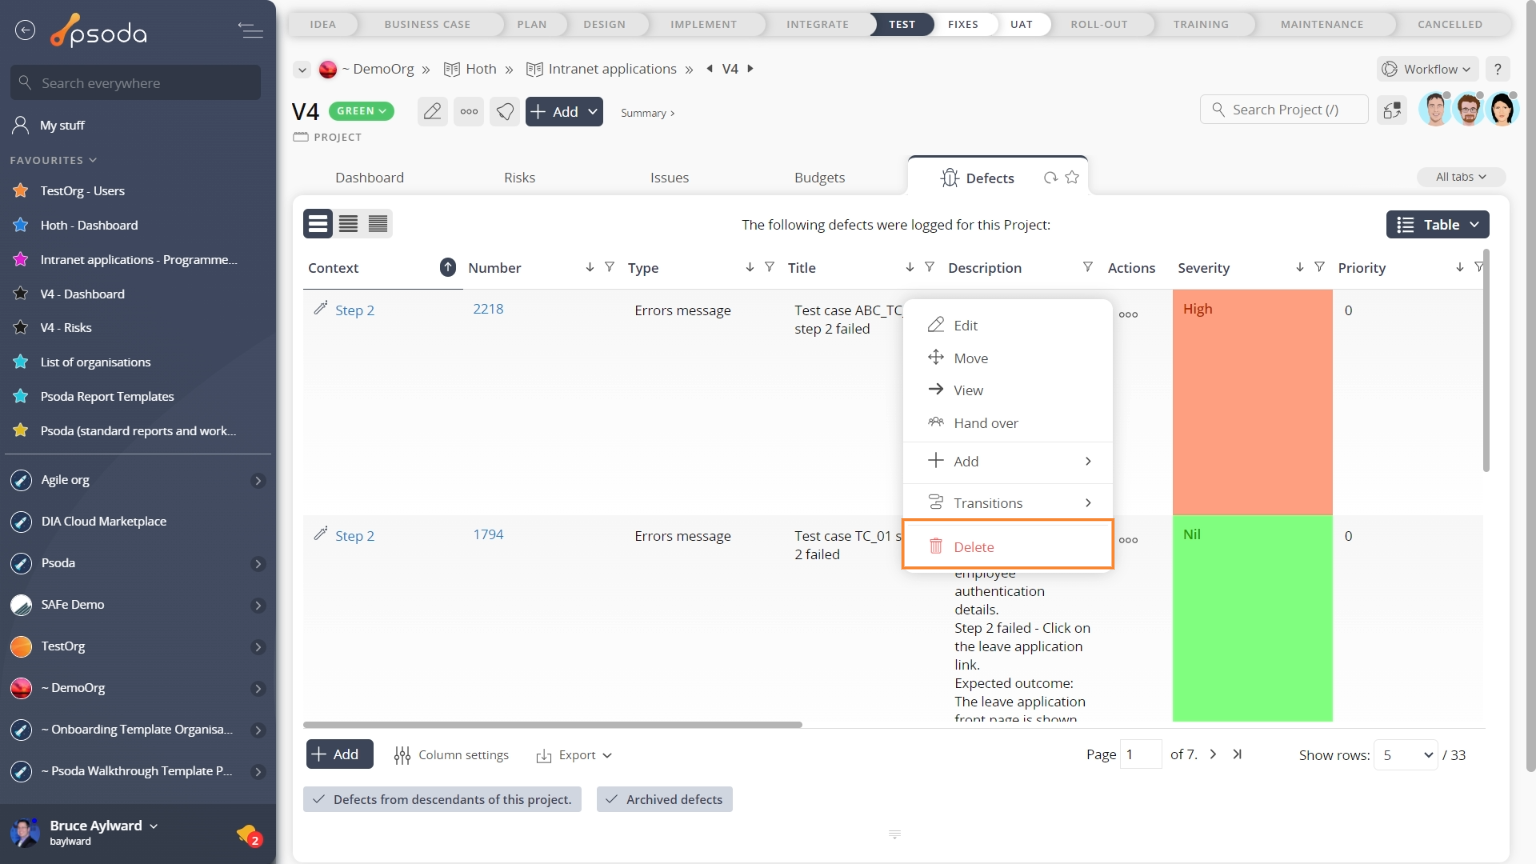
This popup form can be accessed via the defect view page  options menu in the top header area, as shown in Figure 1. Alternatively you can access the
  delete popup form via the defects tabbed view at any of the parent asset view pages (e.g.
  programme,
  project,
  product,
  release,
 test run etc), shown in Figure 2.
If you are sure that you want to delete this defect then click on the “Delete defect” button at the bottom of the form.
Warning: When you delete a defect then all of the  actions,
  attachments and
  comments within that defect will also be deleted.
Click the “Cancel” button if you no longer want to delete the defect.
Figure 1 – Access via options menu  Figure 2 – Access via defects tab
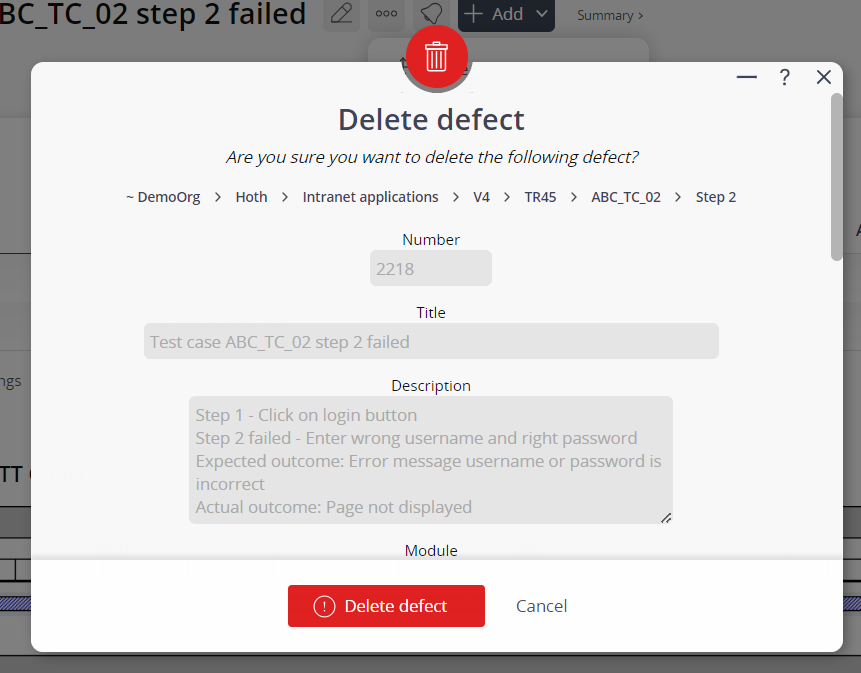
This popup is shown in Figure 3 and is used to delete an existing defect.
Figure 3 – Delete defect form
This form has the following read-only fields:| Asset fields: | Which asset the defect was added on. This may be made up of a number of fields depending on how low a level this defect was added at. |
|---|---|
| Number: | Shows the unique number for this defect. |
| Type: | Shows type for the defect, if a type was assigned to this defect. |
| Title: | Shows the short title for this defect. |
| Description: | Shows a longer description for this defect. |
| Module: | Shows the module the defect was detected on. |
| Version: | Shows the version of the system or module being tested. |
| Build: | Shows the build of the system or module being tested. |
| Symptoms: | Lists any particular symptoms of this defect. |
| Severity: | Shows the severity of this defect. |
| Priority: | Shows the current priority of this defect. |
| Notes: | Lists any technical notes for this defect. |
| Origin: | Shows the origin of this defect. |
| Owner: | Shows the current owner of this defect. |

