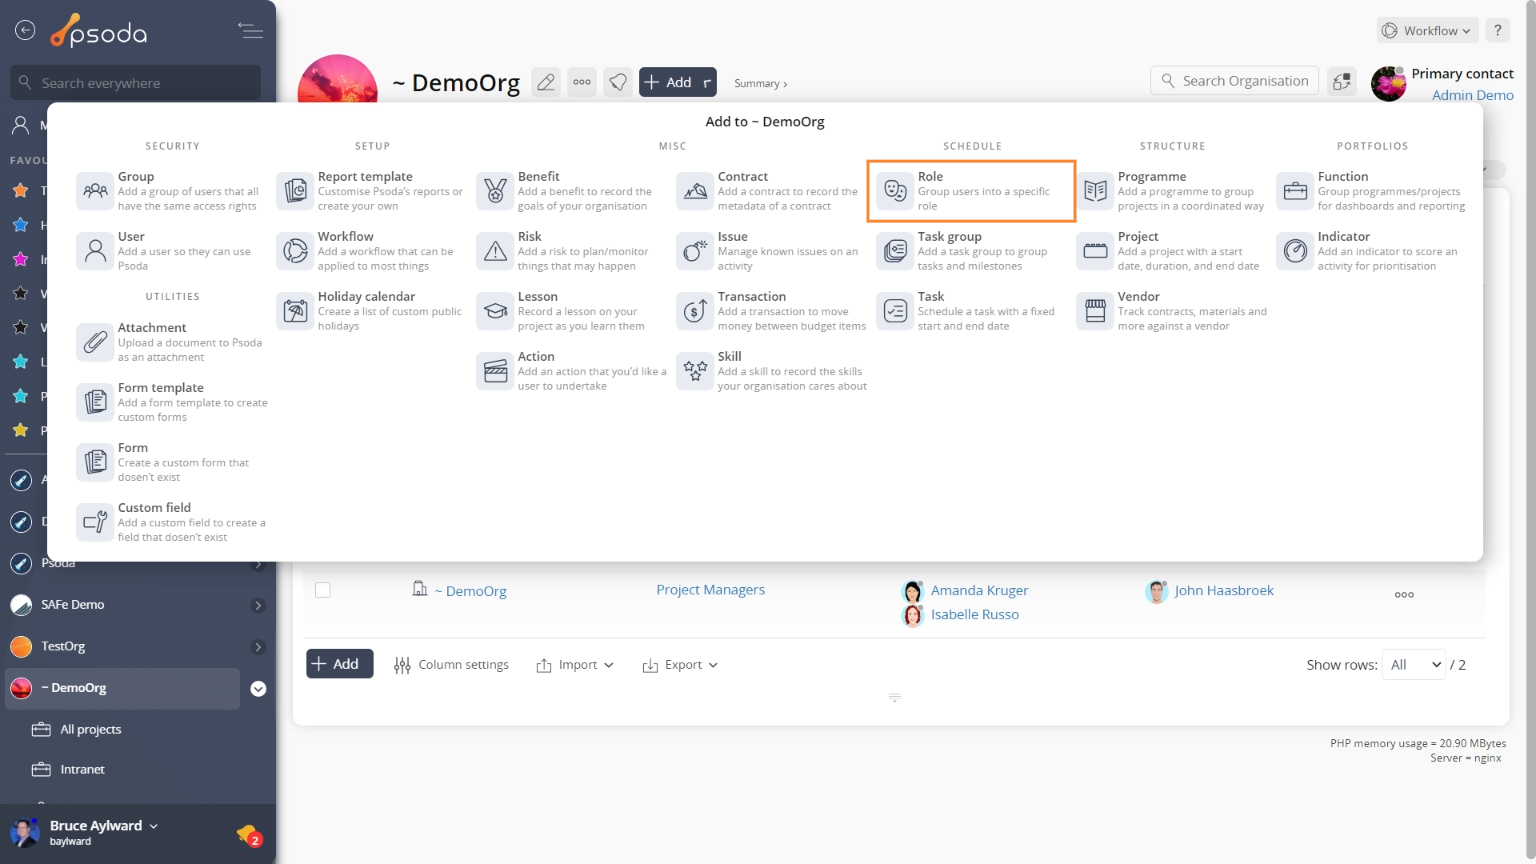
This popup form can be accessed via the  add menu in the top header area of the selected asset view page (e.g.
  organisation,
  programme or
  project view pages, as shown in Figure 1. Alternatively you can access the
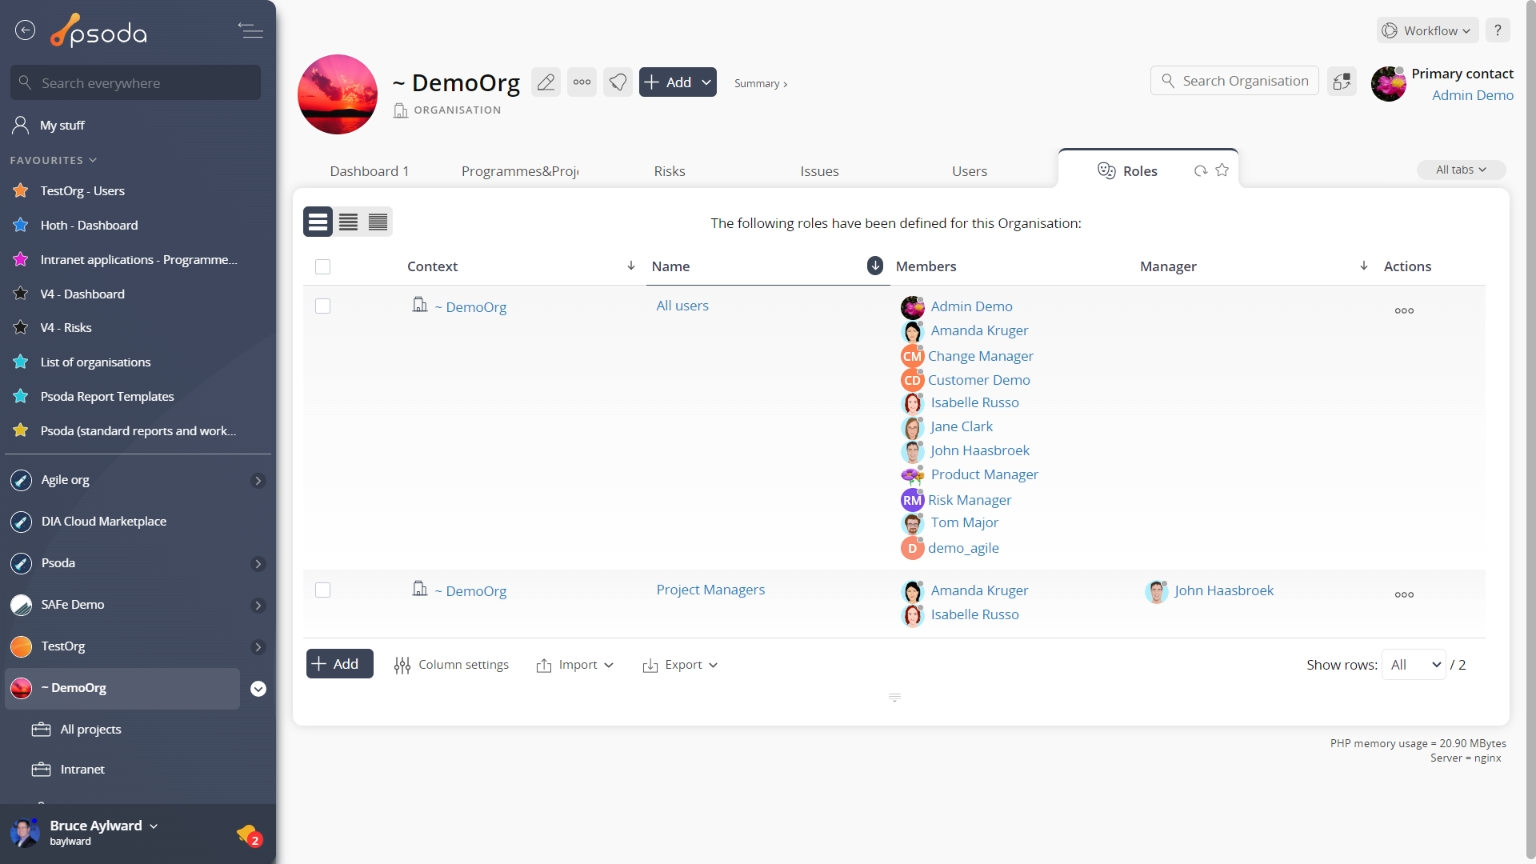
  add popup form at the bottom of the Roles tab at these same view pages, as shown in Figure 2.
Once you are happy with your selection click the “Add role” button at the bottom of the form. This will add a new role with the information that you supplied.
The new role can be viewed in the Roles tab asset listing at the parent asset’s view page, as shown in Figure 4.
Figure 1 – Access via add menu
Figure 2 – Access via roles tab
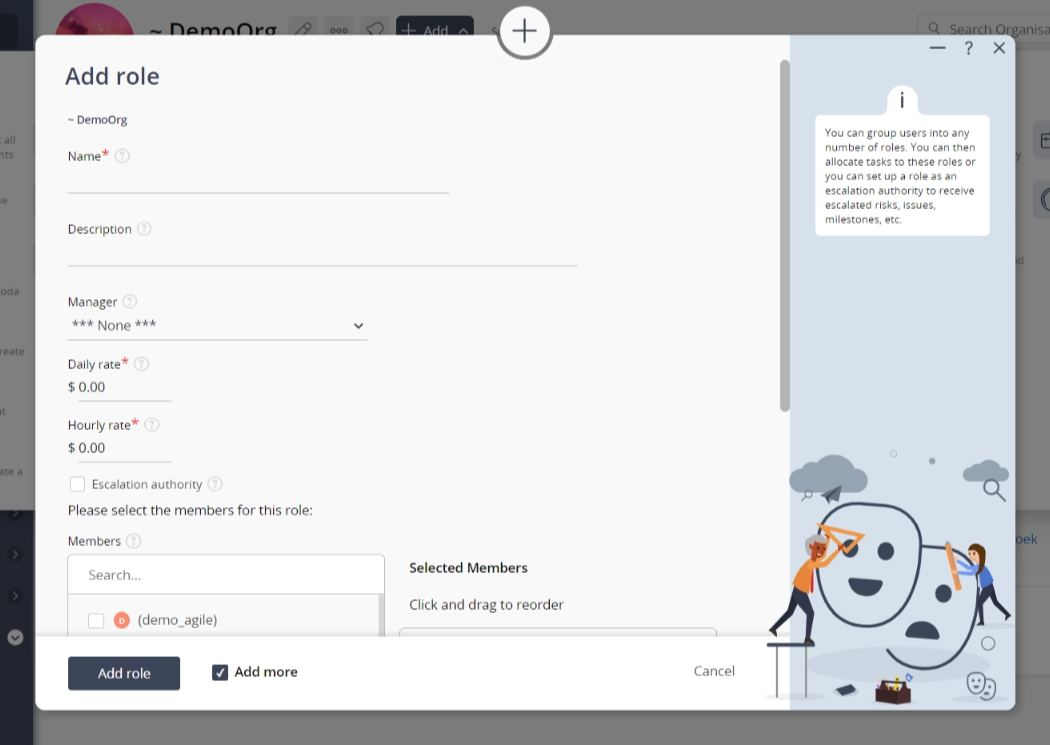
This popup is shown in Figure 3 and is used to add a new role for the selected asset.
Figure 3 – Add role form
This form has the following fields:| Parent Asset: | This read-only field shows which organisation, programme or project you are adding this new role to. |
|---|---|
| Name*: | Enter a name for your role here. The name must be unique across the whole of the selected asset. |
| Description: | Enter a longer description for this new role here. |
| Manager: | Select a manager for this role from this drop-down list of |
| Daily rate: | Enter a daily rate for members of this role. The currency used can be changed by editing the |
| Hourly rate: | Enter an hourly rate for members of this role. |
| Escalation authority: | Select this check box if you would like to allow this role escalation authority. |
| Member selection: | You can select multiple assets/users in the non-members field (left box) by clicking the checkbox or using the SHIFT keys to check multiple assets/users. These checked assets/users will be moved to the members field (right box) beside it. If you want to remove an asset/user, you can uncheck it in the non-members field (left box) or you can press the X button on the asset/user in the members field (right box). You can also drag and drop to rearrange the order in the members field (right box). |
| Add more roles: | Select this check box if you’d like to keep the form open and add more roles to this asset once this new role has been created. |

Figure 4 – View from Roles tab
Click the “Cancel” button if you no longer want to add this new role.

